Running Visual Studio Code on Hopper
Running Visual Studio Code using Open OnDemand
The easiest way to run Visual Studio Code on Hopper is by using Open OnDemand. To do this, navigate to https://ondemand.orc.gmu.edu, log in, and launch VSCode Server. See Open OnDemand on Hopper for more information.
Running Visual Studio Code with Remote SSH
Note
GPU Computing is not available when using VSCode with Remote SSH. For GPU computing with VSCode please use https://ondemand.orc.gmu.edu
For users who do not wish to use Open OnDemand, Visual Studio Code can be run on Hopper worknodes using the Remote Development Extension. To run Visual Studio Code in this way, it is necessary to set up passwordless SSH by following the instructions here Passwordless SSH. This enables secure, hassle-free connections to Hopper and will help to optimize your development workflow. For off-campus connections, it is also highly recommended to connect to the GMU VPN.
Note
If not connecting from a campus location, please connect to the GMU VPN prior to starting a VSCode remote SSH session. SSH port forwarding is disabled on login nodes unless users are inside the GMU network. This will prevent VSCode remote SSH connections from functioning outside networks.
We also recommend limiting the number of VSCode reconnection attempts after any disconnection. This is because VSCode will attempt to automatically reconnect to Hopper in the event of a connection timeout. These connection attempts can cause repeated multi-factor authentication failures and potentially lock your GMU account.
To do this, navigate to the Extensions tab in VSCode and highlight 'Remote - SSH'. Select the gear icon and choose 'Extension Settings'. Then set Remote.SSH: Max Reconnection Attempts to either 0 or 1 depending on preference.

Installing Visual Studio Code on Your Local Computer
To install the latest Visual Studio Code on your machine, visit the official VSCode website, download the installer for your OS (Windows, macOS, Linux) Install Visual Studio Code, and follow the simple setup instructions. This editor provides extensive programming language support, an extension marketplace, integrated Git, and syntax highlighting, enhancing your development workflow.
Installing the Remote Development Extension in VSCode
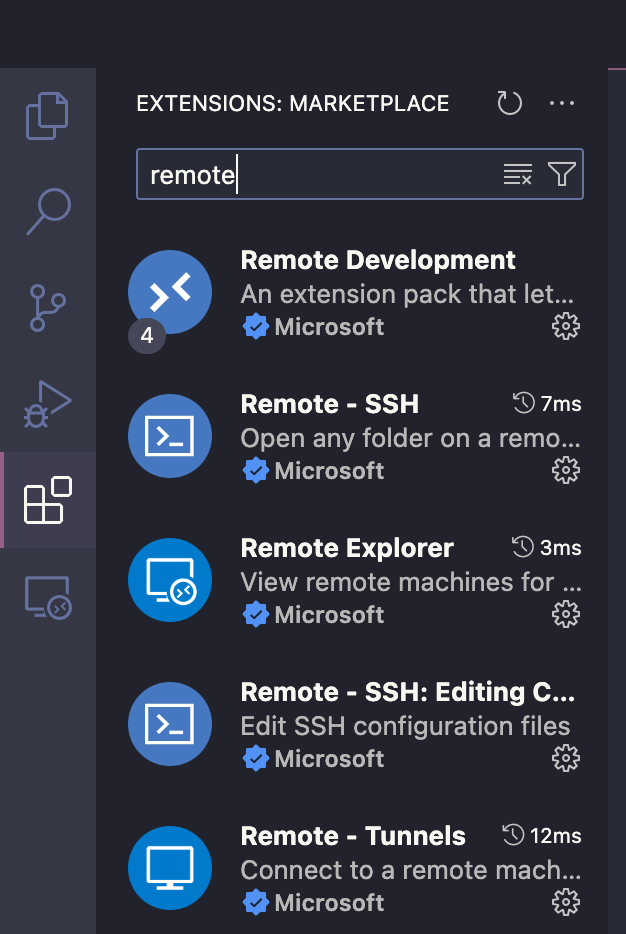
To install the the Remote Development Extension, launch Visual Studio Code and navigate to the extensions tab. Search for "Remote Development" and install the Microsoft extension on your local machine. Once installed, the Remote Explorer icon will appear on the taskbar, below the extensions tab, allowing for seamless remote development setup.
Remote SSH setup
Click on the Remote Explorer tab in Visual Studio Code to access the Remotes (Tunnels/SSH) layout. Hover over SSH under this section and click on the gear icon to set up the SSH config file. Select the default path option when prompted and press enter. Then, copy the script provided below and paste it into your config file to configure SSH for remote development.
# Read more about SSH config files: https://linux.die.net/man/5/ssh_config

Host hopper
    HostName <hop0##>
    User <username>
    ProxyJump hopper_headnode

Host hopper_headnode
    HostName hopper.orc.gmu.edu
    User <username>
Customize your SSH config by replacing 'User' with your GMU NetID. To get the 'HostName', open a terminal and log into Hopper using:
ssh your_gmu_netid@hopper.orc.gmu.edu
Replace your_gmu_netid with your actual GMU NetID. This connects you to Hopper for further operations.
Allocating a Work Node
Method - 1
Once logged in, use the salloc command to allocate the necessary compute resources on the cluster. This reserves the required computational power for your tasks, ensuring smooth and efficient execution of your projects.
salloc --ntasks=1 --nodes=1 --partition=normal --time=1:00:00
After using the salloc command, you'll receive the Host Name for the node allocated to you. Update your configuration by replacing the HostName with the specific node, such as "hop051", and save the changes.

Method - 2
An easy way to allocate a worknode is to allocate a node using an OnDemand Desktop Session. Navigate to OnDemand and select the Desktop App. Choose the desired partition and resources for the job and press "Launch". Wait for you allocation to complete and note the worknode that your job was assigned.
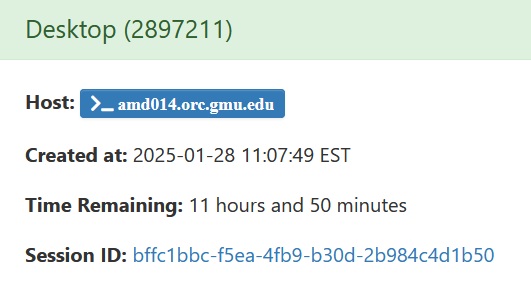
Update your SSH configuration in VSCode by replacing the HostName with the specific node, and save the changes.
Method - 3
Execute the script by using the sbatch command, which queues and runs your task within the cluster's job scheduling system.
#!/bin/sh

#SBATCH --job-name=vscode_session

#SBATCH --partition=normal

#SBATCH --output=/scratch/%u/%x-%N-%j.out # Output file
#SBATCH --error=/scratch/%u/%x-%N-%j.err # Error file
#SBATCH --mail-type=FAIL    # ALL, NONE, BEGIN, END, FAIL, REQUEUE,..
#SBATCH --mail-user=<GMUnetID>@gmu.edu # Put your GMU email address here

#SBATCH --mem=4GB # Total memory needed per task (units: K,M,G,T)
#SBATCH --time=0-4:00 # Total time needed for job: Days-Hours:Minutes

#SBATCH --cpus-per-task 2 # Request extra CPUs for threads
#SBATCH --ntasks 1 # Number of processes you plan to launch
##SBATCH --gres=<ADD GRES HERE>

## Load the relevant modules needed for the job

## Run your program or script
bash
sbatch reserve_cores.slurm
Run the command below in your terminal to find out which compute node has been assigned to you. This ensures you're connecting to the correct node, optimizing your resource use and workflow.
squeue --me

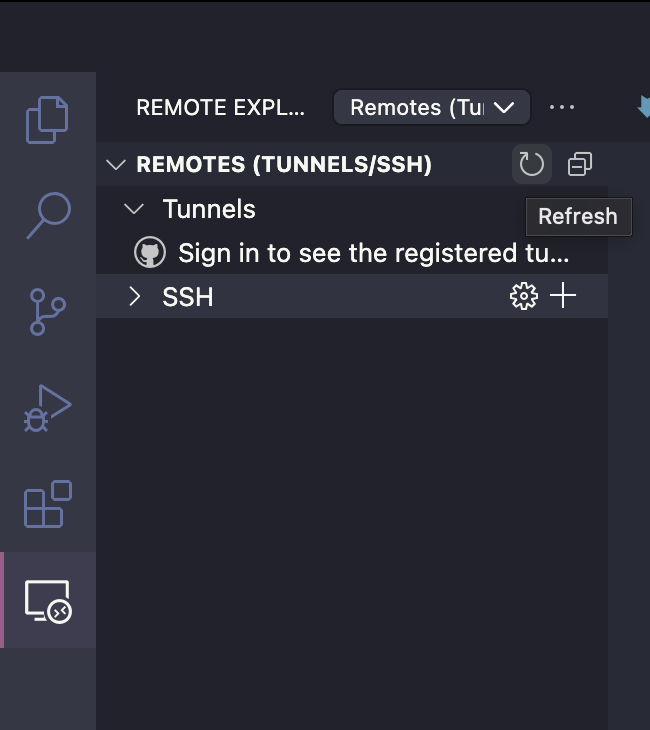
Click on the refresh button to sync your recent changes, ensuring your remote development environment is correctly connected to your assigned resources. This action updates your setup, optimizing your workflow and maintaining a stable connection to the designated resources.
Connecting to the Allocated Hopper Compute Node
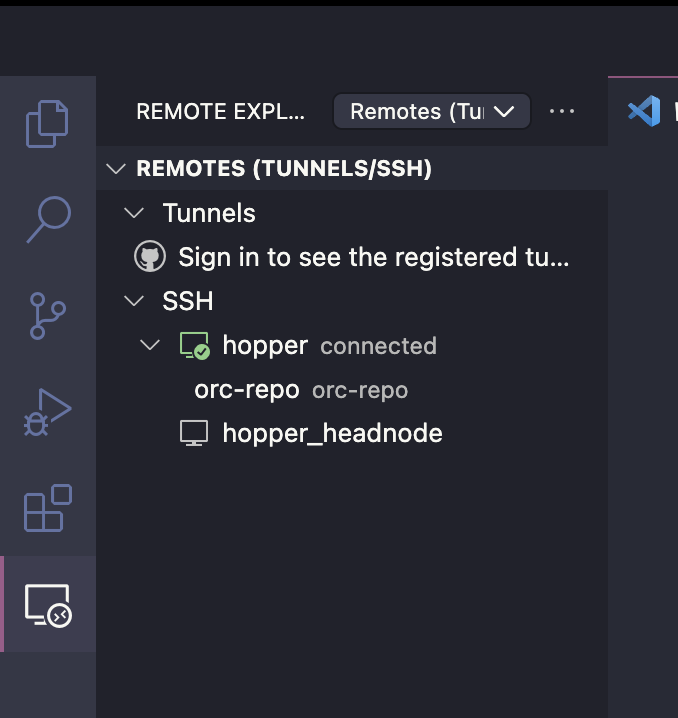
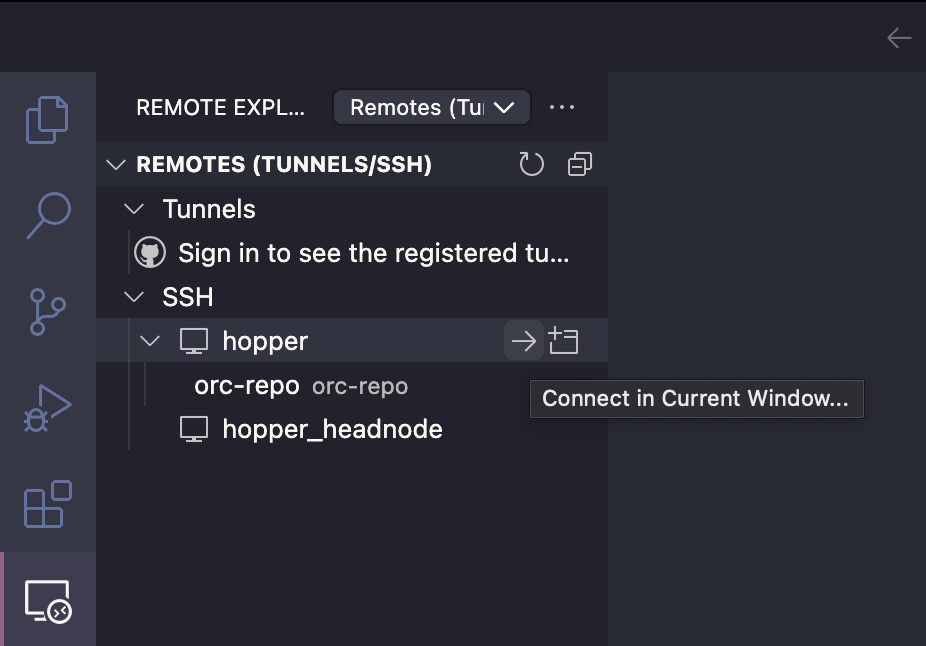
After you have allocated a work node using one of the methods, navigate to the Remote Explorer tab in Visual Studio Code and refresh the remotes tree to update the SSH configuration. Expand the SSH tree to find 'hopper' and 'hopper_headnode'. Hover over 'hopper' to see two icons: one connects you to the Hopper cluster in the current window, and the other opens a new window for the connection. Choose as per your preference.
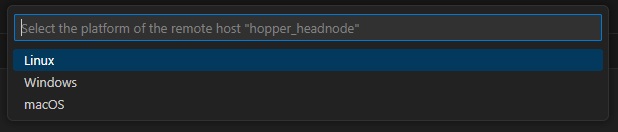
When connecting to a node for the first time, you will asked to verify that you want to continue. Press enter or select 'Continue'. VSCode will also ask you to select the platform of the remote host. Choose 'Linux'. Check the connection status under the SSH tree, which should indicate 'Connected'. This confirms a successful setup, allowing you to open a terminal in VS Code and start executing your scripts on the Hopper cluster efficiently.